
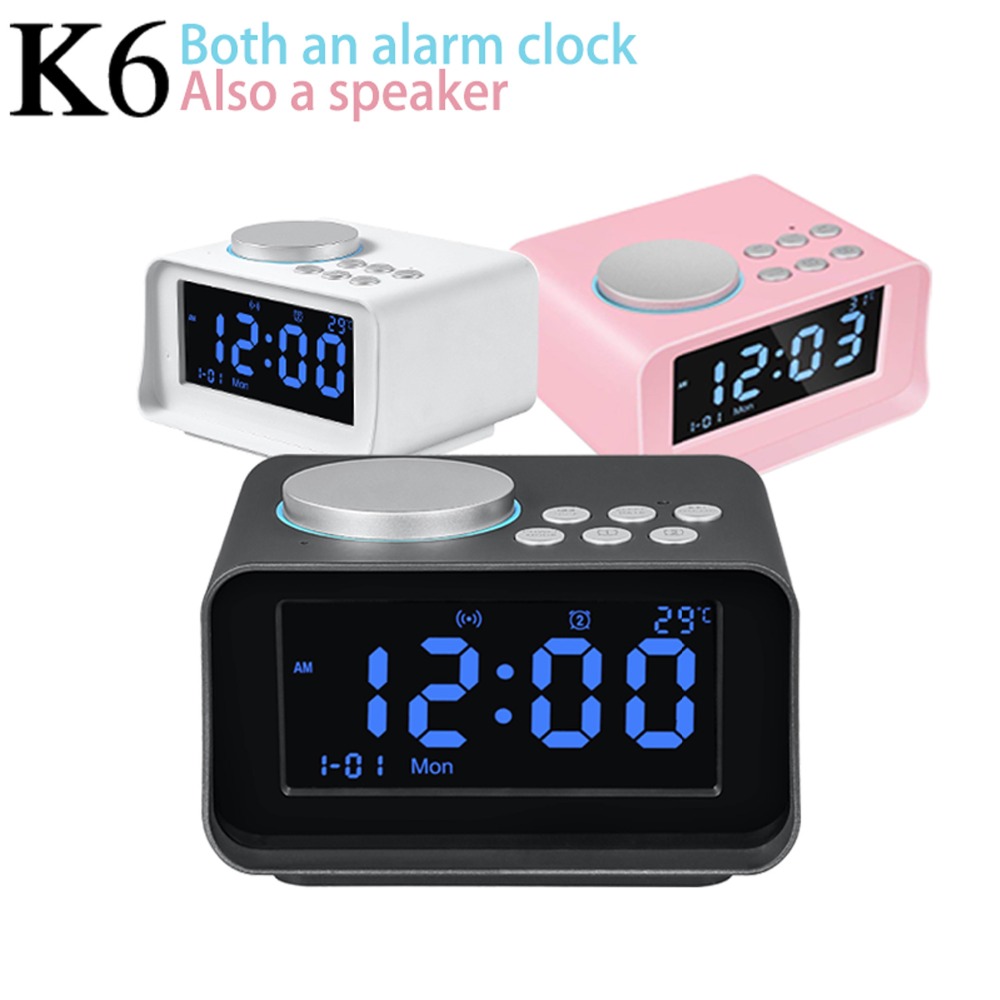


UK/EU/US Plug Multi-function Digital LED Alarm Clock Wireless Bluetooth Speaker Smart LED Night Light Table Lamp Alarm Clock
NOTE:
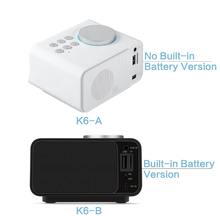
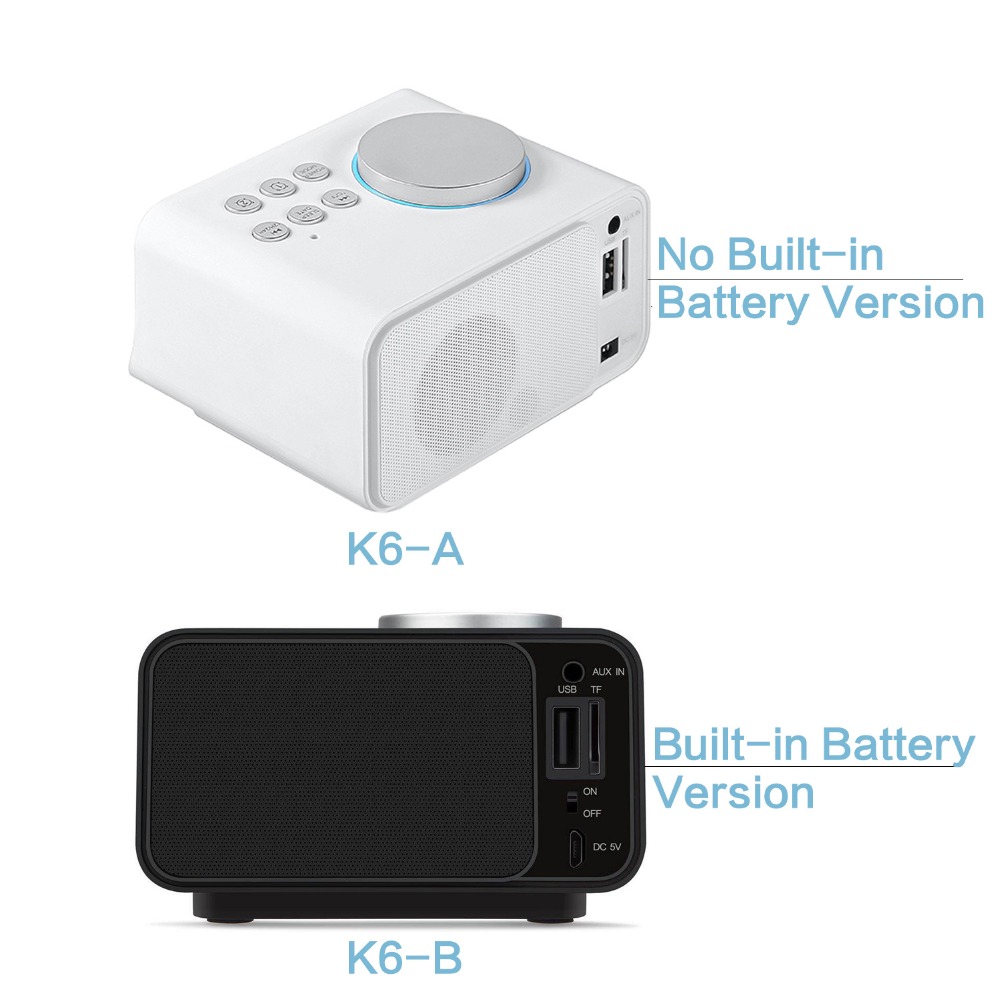
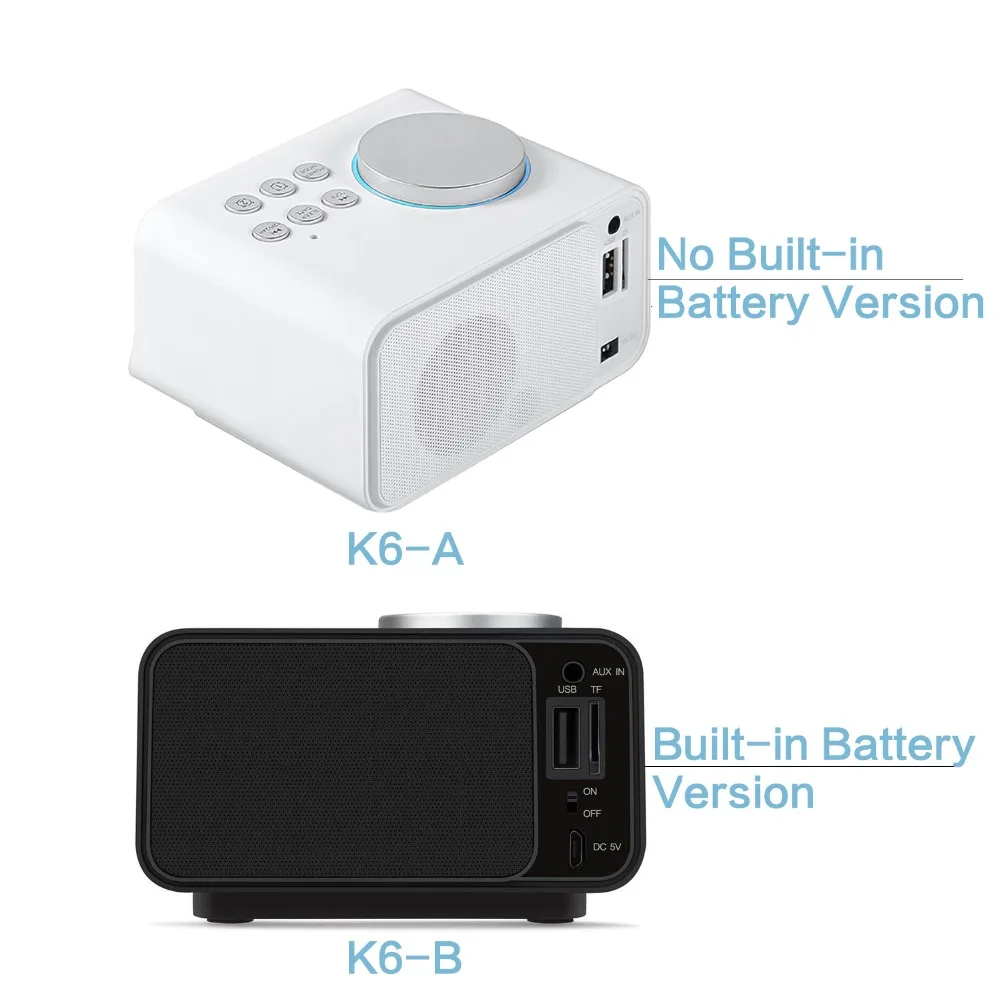
there are 2 versions of this model: K6-A & K6-B
Please choose the right version that you want![]()
About The Product:
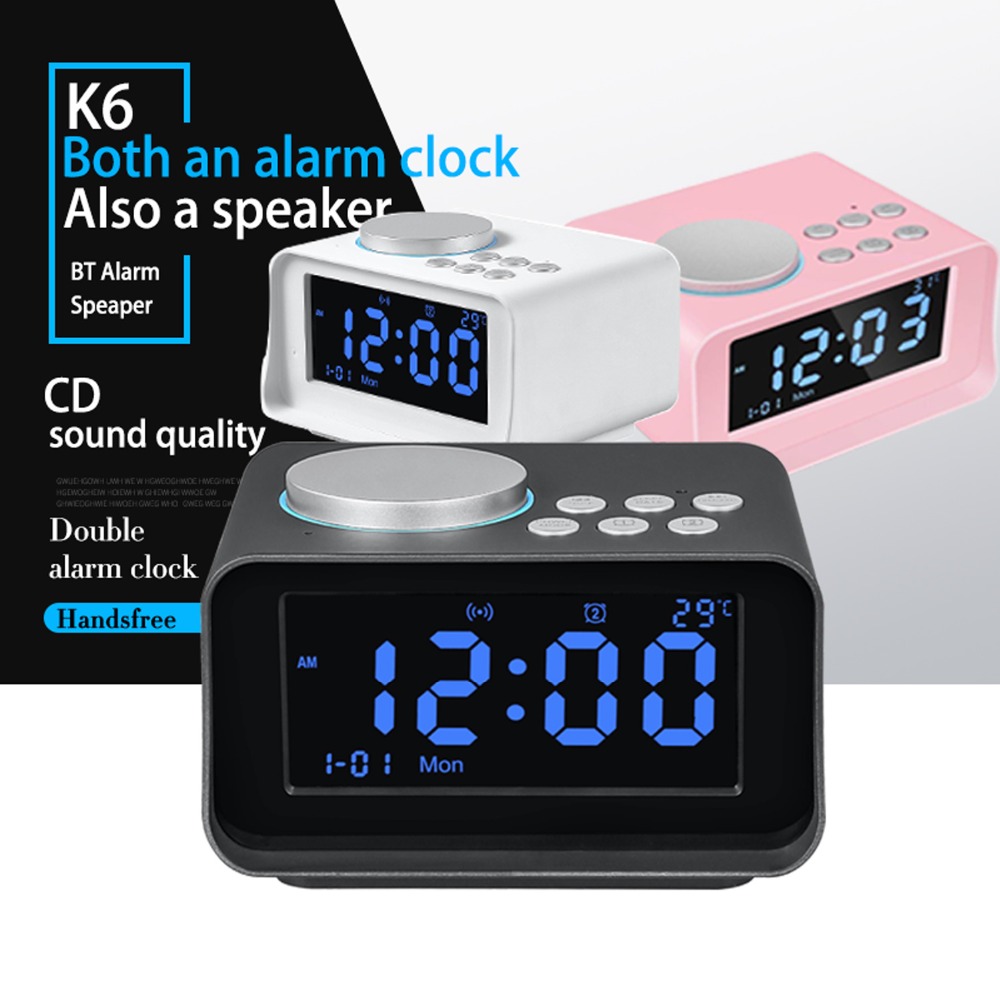
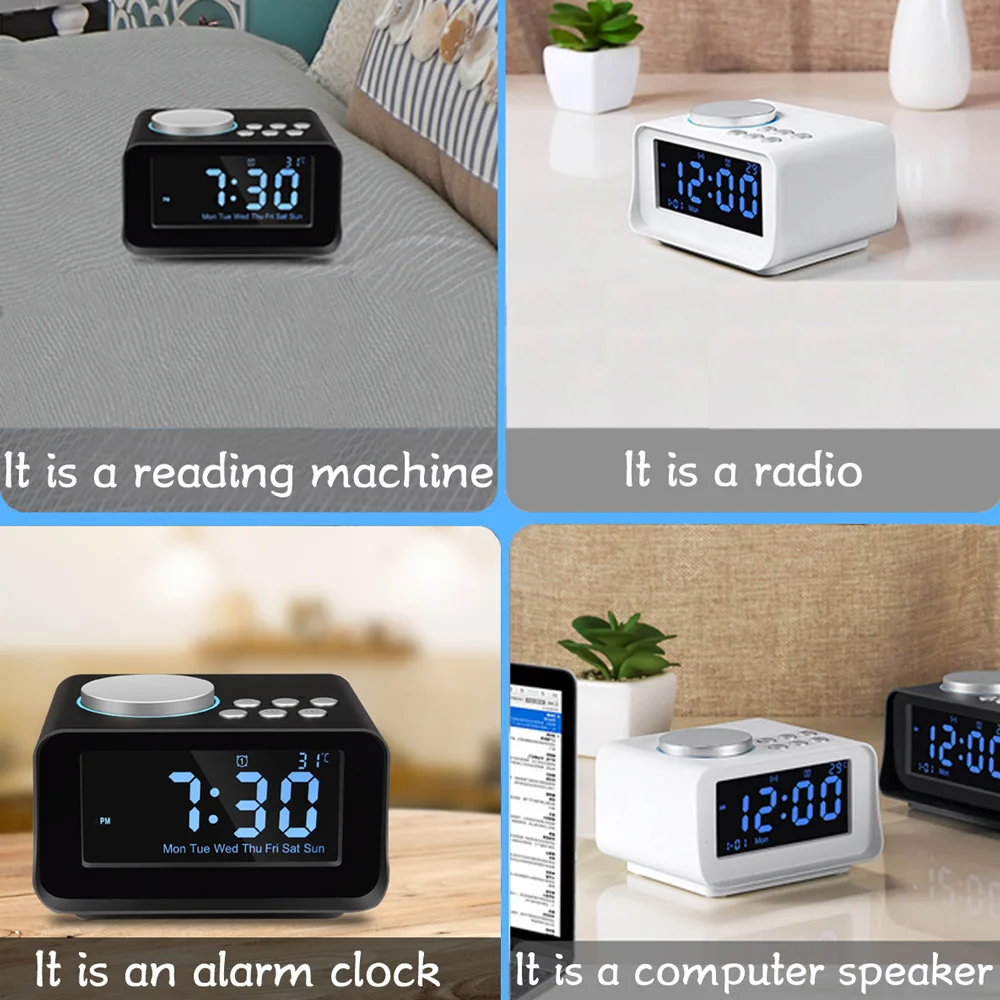
1. USB Radio alarm clock. Our alarm clock differ from others, we have 6 bttons and have temperature display, so that are more functional than others. Compact size is space saving on small desk. It good for students and workers. Get rid from your old boring alarm clock and uplift your room and décor with something contemporary and equally functional.
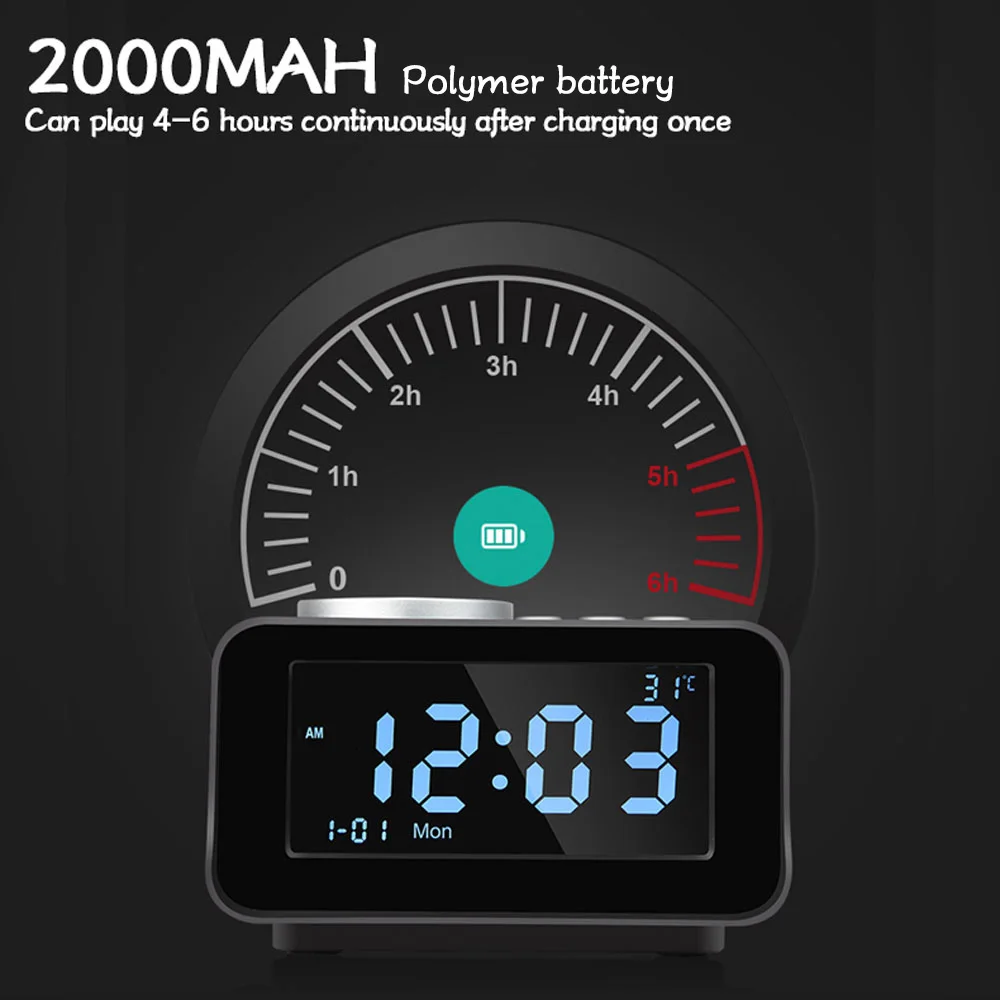
2. Including 1 USB port, charging your Phone and tablets by USB port, Built-in transformer, safe and fast charging. USB port makes charging phone very convenient and eliminates the need for more wires to plug into the wall outlet. Digital LCD Display and Battery Backup Function is best for Travel, Kitchen, Bedroom, Office, Table and Desk.
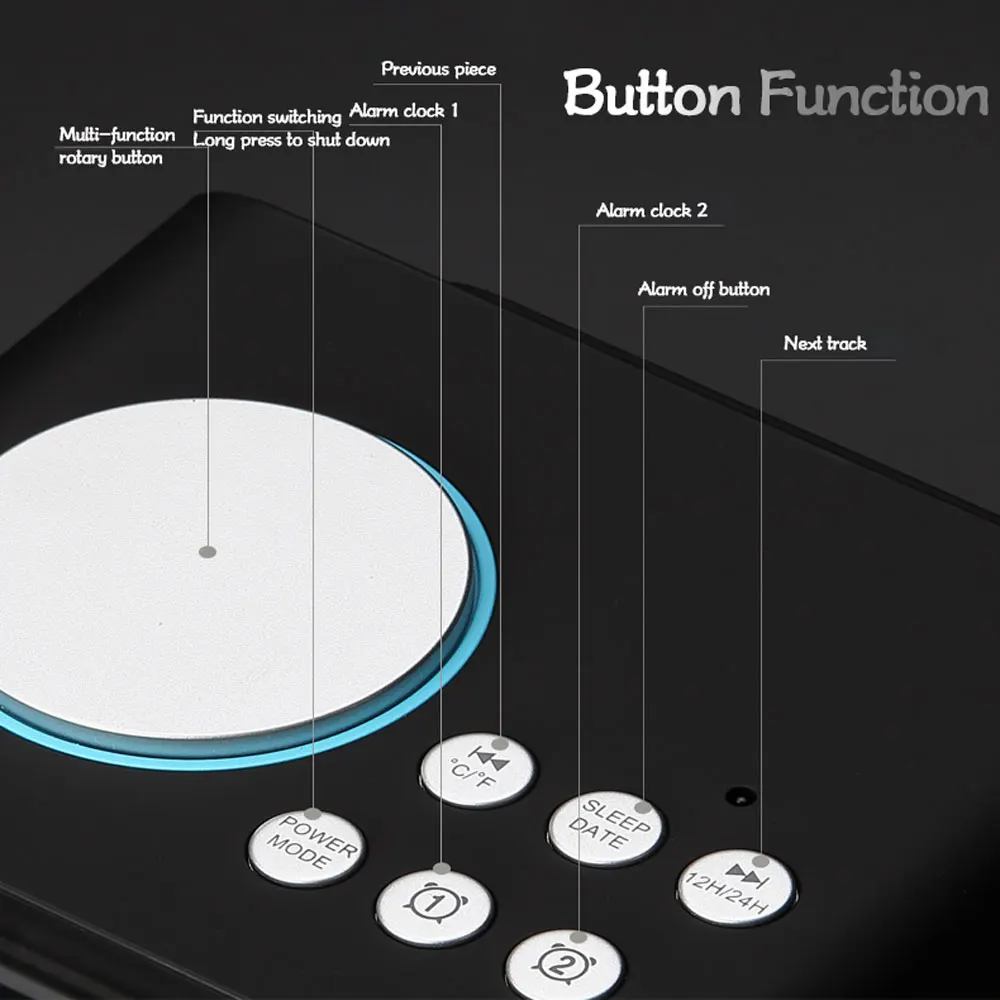
3. Adjustable Clock: 12H/24H Switch, snooze functions, you can setup two different wake up time with either alarm ringtone or FM radio. The alarm volume can be adjusted by rotate the rotary button, suitable for heavy sleepers and light sleepers.
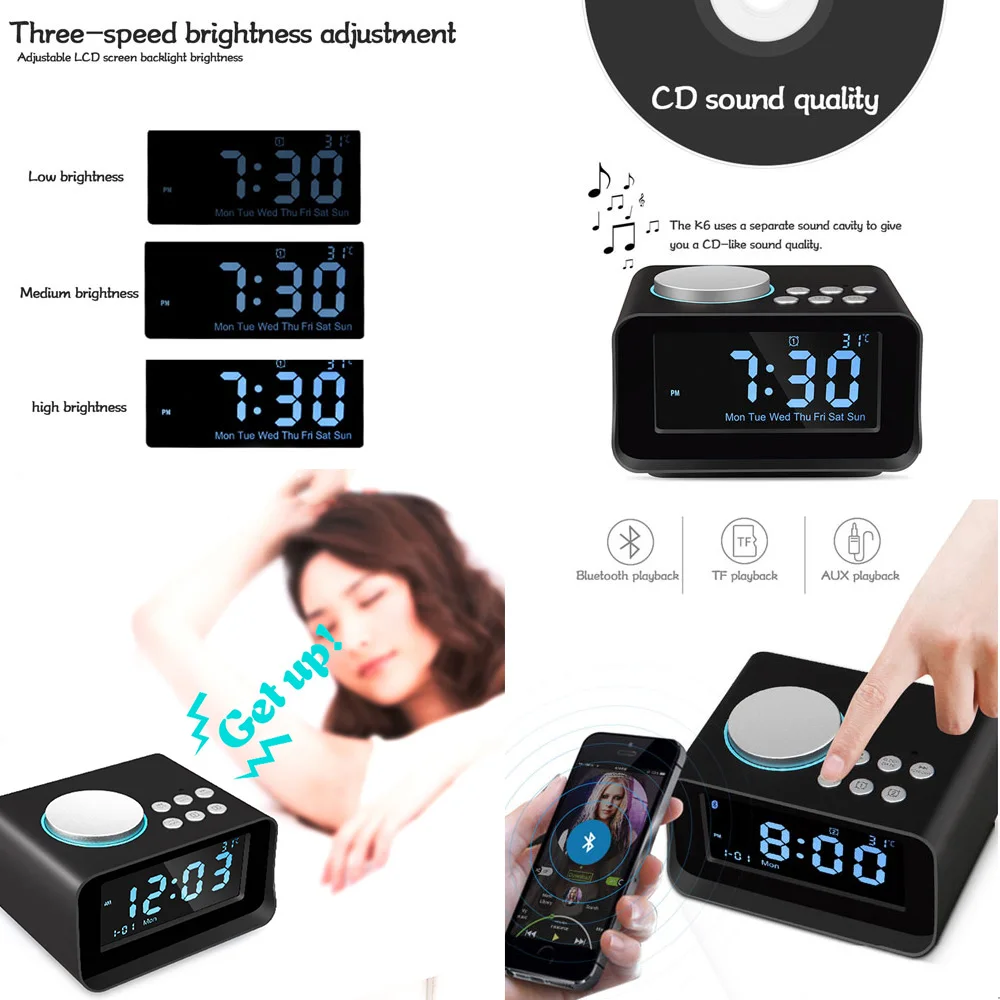
4. Easy to be read: 3.2 inches backlight LCD large display with LCD dimming for easy readability during the day or at night. No dazzling,No disturb your sleep.Backup Battery keeps Time and Alarm setting even power gone. Numbers are sharp making them easy to read even from a distance.
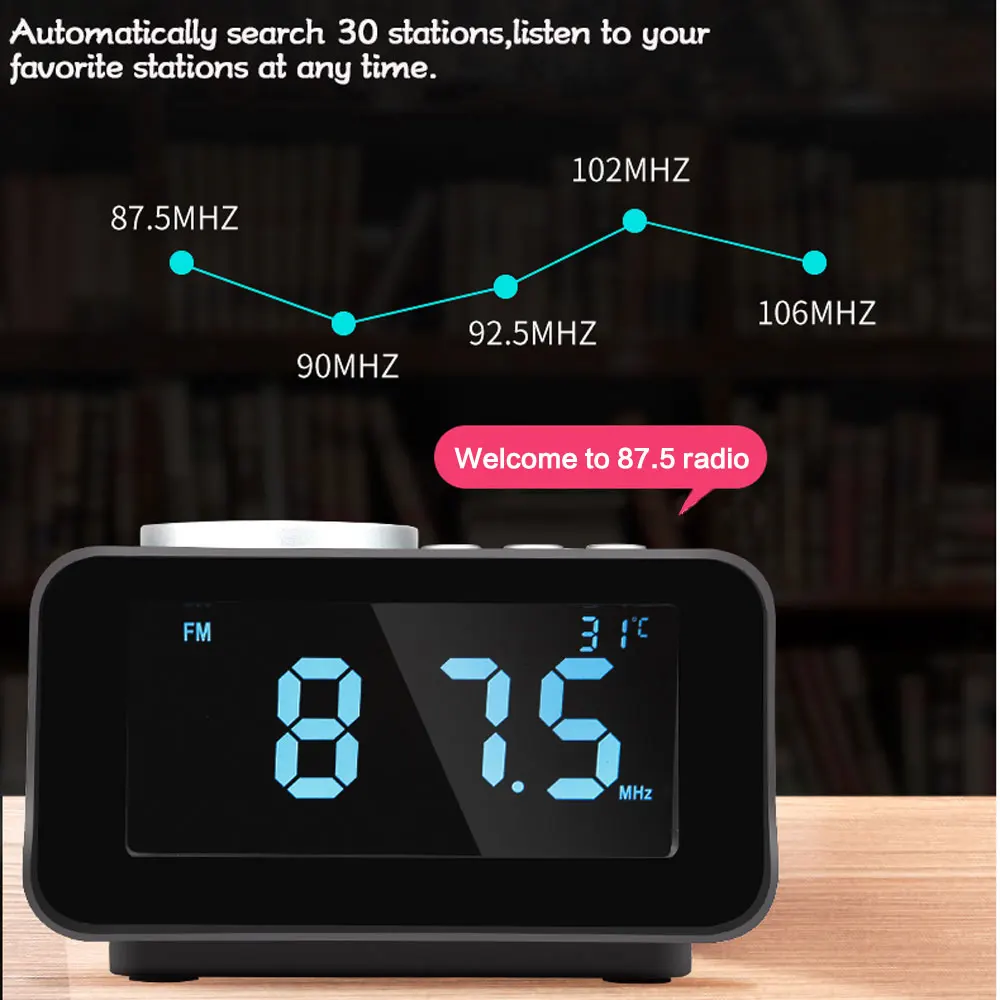
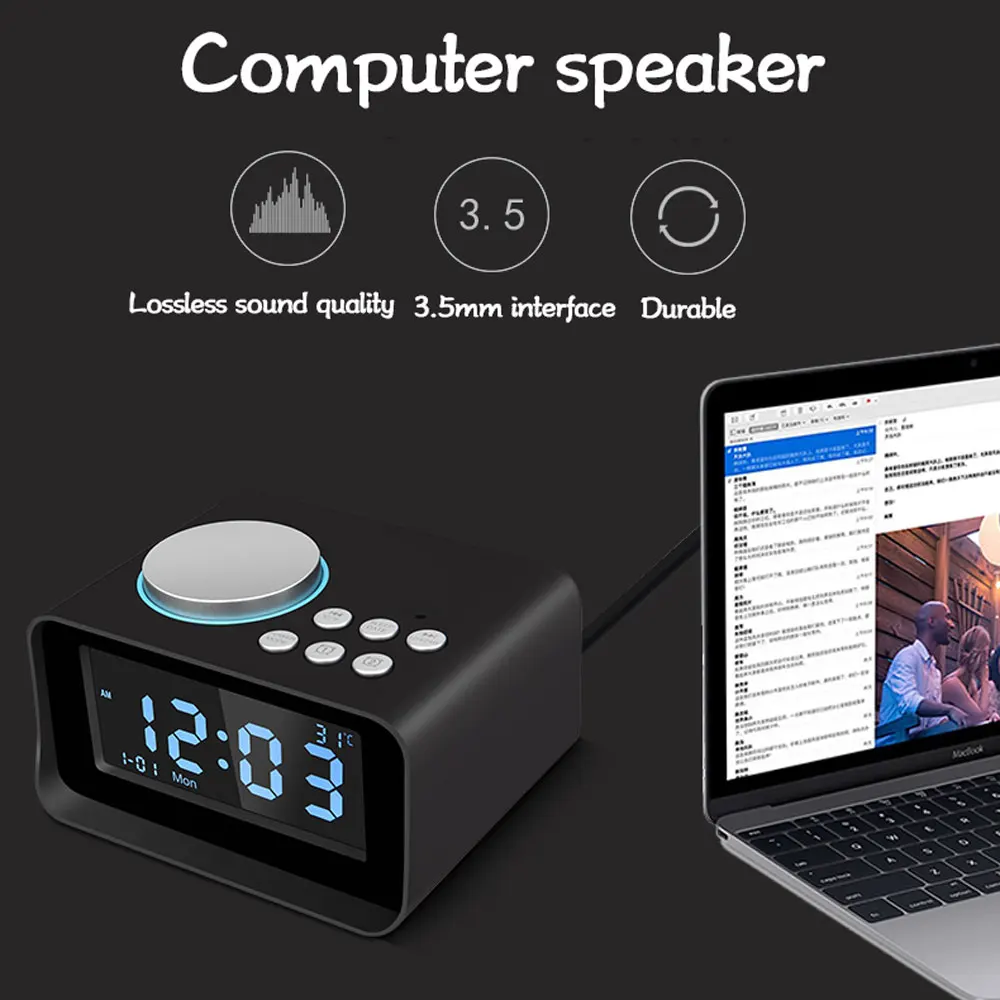
5. Music and FM radio play: Listen to your favorite music using your Phone or MP3 device through the 3.5mm AUX input (as a mini speaker) or using the built in FM radio which memory for up to 20 programmable stations. It is the best gift for your friend, parents, or your children.
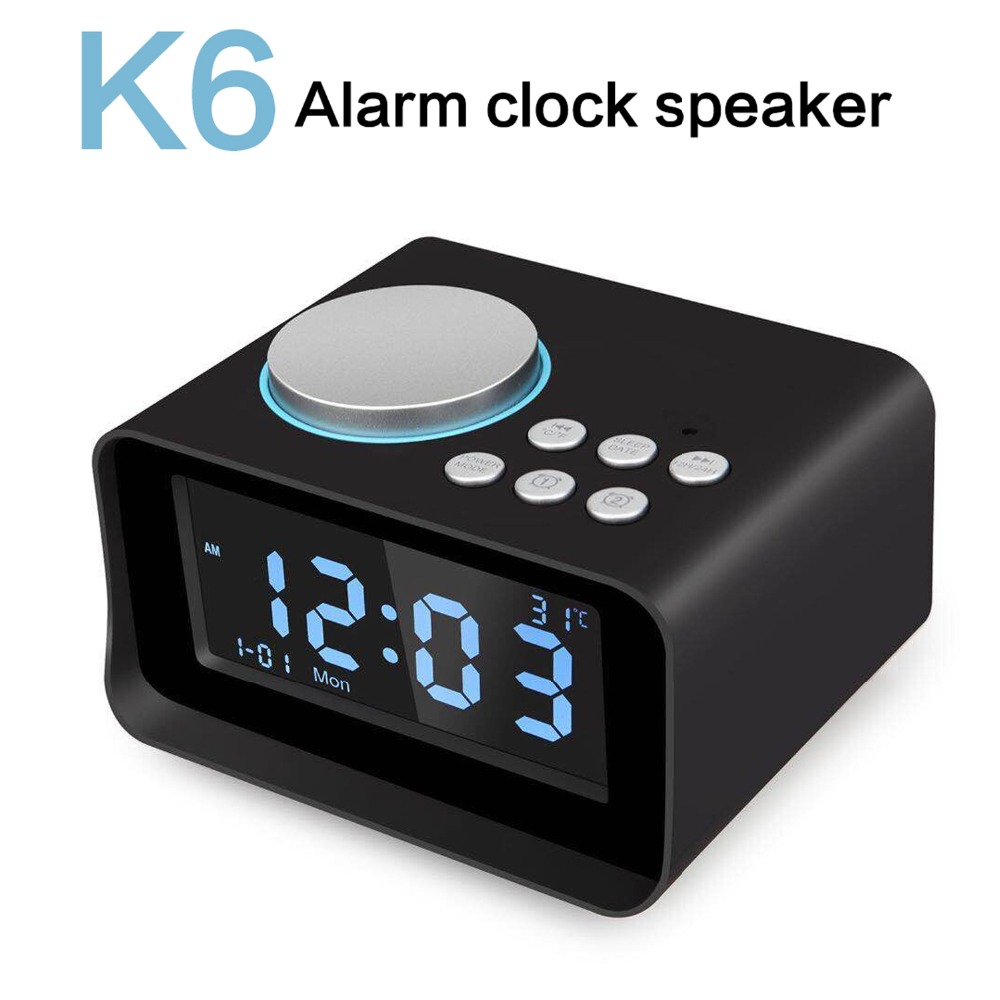
1. Functions
1. Bluetooth speakerphone for conference calls
2. 3.2″ LCD display screen
3. Digital FM radio
4. Support TF Card for storing your favorite music
5. Support USB Drive for storing your favorite music
6. 3.5mm audio jack for connecting other audio sources
7. Snooze function
8. USB port charger
9. Dual alarms
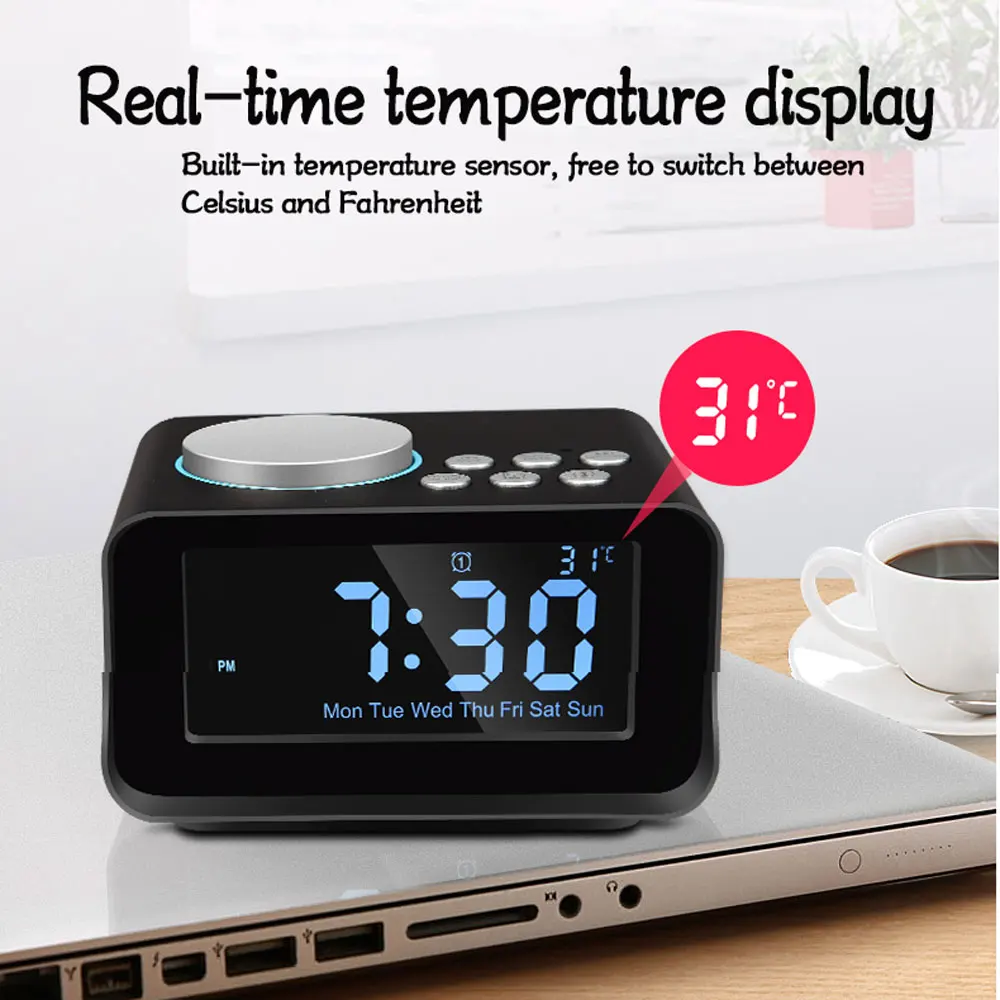
10. Built-in thermometer(Celsius or Fahrenheit)

Time Setting
1. In the energized state, long press the rotary button to enter time setting, when HOUR figure begins to flash please revolve the rotary button o adjust HOUR. Then,short press the big button to confirm the HOUR setting and begin to set the MINUTES.When MINUTES figure begins to flash, please revolve the rotary button to adjust MINUTES. Then, short press the big button to confirm the MINUTE setting and exit time setting.
2. Press 12H/24H button can be switched time display mode for 12 hours(AM/PM) or 24 hours display.
Note: Time setting can not be adjusted in BT, USB, TF, FM or AUX mode (There is a symbol of BT, USB?, TF, FM or AUX in the upper left part of LCD screen).
Date Setting
1. In the energized state, long press the DATE button to enter date setting, when YEAR figure begins to flash, please revolve the rotary button to adjust YEAR. Then, short press the big button to confirm the YEAR setting and begin to set the MONTH. When MONTH figure begins to flash, please revolve the rotary button to adjust MONTH. Then, short press the big button to confirm the MONTH setting and begin to set the DAY. When DAY figure begins to flash, please revolve the rotary button to adjust DAY. Then, short press the big button to confirm the DAY setting and exit date setting.
2. When the completion date is set, the week is setautomatically?
Alarm Setting
1. In the energized state, long pressing alarm1 button to enter alarm setting, when HOUR figure begins to flash, please revolve the rotary button to adjust HOUR. Then, short press the rotary button to confirm the HOUR setting. When MINUTES figure begins to flash, please revolve the rotary button to adjust MINUTES. Next, short press the rotary button to confirm the MINUTE setting and begin to set the working day alarm clock mode. When WEEK figure begins to flash, please revolve the rotary button to choose WEEK. Next, short press the rotary button to confirm the WEEK and begin to set ring tone.
2. Please revolve the rotary button to choose FM, USB, TF, buzzer after confirming the Alarm setting. Then, short press the rotary button to confirm ring tone and begin to choose alarm volume. Please revolve the rotary button to choose the alarm volume. Finally, short press the rotary button to confirm.
3.When the alarm 1 goes on, press alarm 1 button to turn it off.
4.There is a symbol alarm 1 in the middle-upper part of screen which means that you turn the alarm 1 on.
5.The setting of alarm 2 is the same as alarm 1 (The alarm clock 2 does not set the work day alarm clock).
6.Working day alarm clock can be set from Monday to Friday, Monday to Saturday and Monday to Sunday.
Note: This product provides dual alarm clock function.
Alarm 1 for long-term alarm clock (Once the clock was set up, the alarm will work everyday if you don’t turn off the alarm manually).
Alarm 2 for temporary alarm clock(Once the clock was set up, the alarm will work once time, it will turn off the alarm automatic).
Snooze Setting
1. When the alarm goes off, Press the rotary button to enter the snooze function. It will ring 10 times and every 6 minutes a time.
2.When the alarm goes off , without any action to turn it off, the alarm will continue ringing and turn off automatically after 60 minutes.
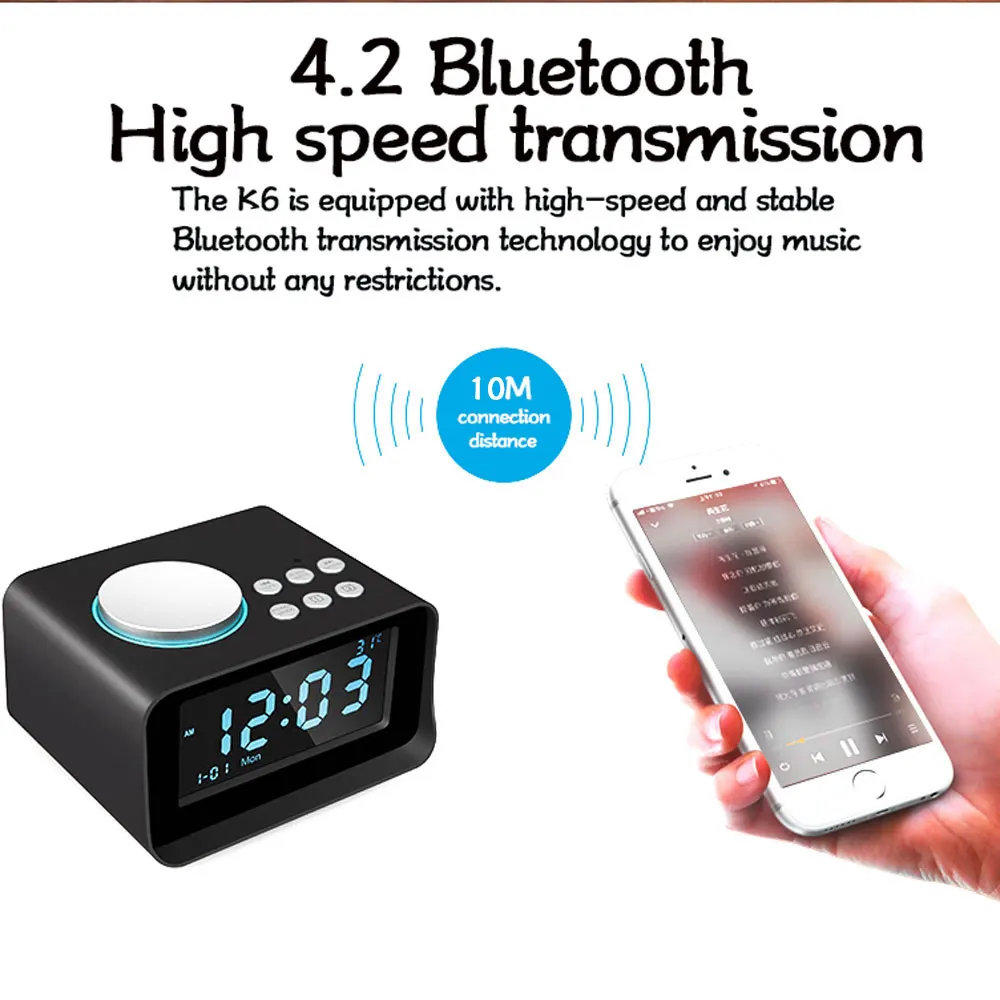
Bluetooth Play
1. Operation
Press MODE button to choose Bluetooth mode(There is a BT symbol in the upper left part of LCD screen).
Go to mobile settings, turn on Bluetooth and search Bluetooth devices. Connect “K6”. When it is successfully paired, you will hear a sound of “DU”. Play music from your mobile now. (When Bluetooth is connected, press “Mode” to switch it to other mode, Bluetooth will be OFF automati-callyand get disconnected with mobile. When switching it to Bluetooth mode again, connect “Smart one” manually or automatically.)
2. Answer the Phone
When a phone call is coming, press the rotary button to answer the phone.
3.Play Music
When play music, press the rotary button to pause the music. Press to skip backwards last song; Press to skip forwards next song.
FM Radio Play
For enhancing Radio signal, please insert the 3.5mm stereo audio cable head into the back of host 3.5mm audio jack before you use it.
1. Auto-scan radio station
Press MODE button to choose FM mode(There is a FM symbol in the upper left part of LCD screen)
Long press rotary button to auto-scan radio station. In this mode, FM radio will scan and auto-store the scanned stations(freuency from 87.5MHz to 108MHz). If this device auto-scan a valid radio station, it will broadcast about 15 seconds then auto-scan next valid station. When auto-scanning is finished, it goes back to play the 1st stored station. Pressing next or previous button can select the stored station. Press Previous or Next to select the station.
2. Manual-scan radio station
Long pressing next or previous to select the manual-scan radio station.
Note: 30 radio stations could be preset.
USB and TF Play
1. Operation
Press MODE button to choose USB or TF mode(There is a USB or TF symbol in the upper left part of LCD screen).
Press send back the inserted U Disk or TF Card interface host(U Disk and TF Card with Mp3 song)
2. Play Music
When play music, press the rotary button to pause the music. Press previous to skip backwards last song; Press next to skip forwards next song.
Auxiliary Play
Press MODE button to choose AUX mode(There is a AUX symbol in the upper left part of LCD screen) .
Connect your device with the alarm clock by 3.5mm stereo line cable.
Press the rotary button to Play/Pause. Revolve rotary button to adjust volume.
SLEEP Function under ON Mode
Press “SLEEP” to set timing shutdown time 15-30-45-60-75-90-00(OFF). Choose the time, it will store it automatically in 3 seconds and exit the setting. To see the remaining sleep time, press “SLEEP”
Thermometer
Press temperature button to switch between Celsius and Fahrenheit.
Display Brightness Adjustment
Press Rotary button to adjust 3 levels brightness of the LCD display o turn of the LCD brightness.
Note: LCD brightness cannot be adjusted in play music mode.
USB Charging
The unit is added with USB output charging interface.The USB interface can charge for iPod, mobile Phone and iPad.
Back-up Button Battery
The 3V button battery is to retain the alarm/clock setting in case of a power failture. It can not display the alarm/ clock time.
What’s included
1Pcs * K6 Speaker Clock
1Pcs * Aux-in Cable
1Pcs * Power Adaptor
1Pcs * User Manual